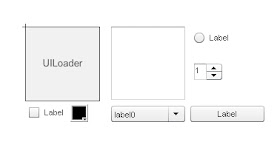
First we will design look of cell.

Then create class that extends MovieClip ( or Sprite or some component if we use different cell design) implementing the ICellRender Interface.
package
{
 import fl.controls.listClasses.ICellRenderer;
 import fl.controls.listClasses.ListData;
 import fl.events.ListEvent;
 import flash.display.MovieClip;
 import flash.events.MouseEvent;

 /**
  * ...
  * @author DefaultUser (Tools -> Custom Arguments...)
  */
 public class CustomCellRenderer extends MovieClip implements ICellRenderer
 {
  private var _listData:ListData;
        private var _data:Object;
  public function CustomCellRenderer()
  {

        }

  public function set data(d:Object):void
  {


            _data = d.TestColumn;


   textTextArea.text = _data.label;
   checkCheckBox.selected = _data.checked;
   imageUILoader.source = _data.icon;

   //colorColorPicker.selectedColor = _data.color;

        }
...
Most important to be implemented is "data" property
public function set data(d:Object):void which is called each time object from your DataProvider is supplied for the cell.You will need to create objects that comply to your above cell design movie clip. DataProvider([{TestColumn:{color:0xFF00FF,label:"testText1",checked:true,icon:"logo.gif"},normalColumn:"normalText1"},
{TestColumn:{color:0x0000FF,label:"testText2",checked:false,icon:"logo.gif"},normalColumn:"normalText1"}]);Next you should linkage the cell design movie clip with the custom class CustomCellRenderer

When we use custom cells in other components we do
component.setStyle("cellRenderer",CustomCellRenderer)but for DataGrid we will customize one column cell
column.cellRenderer=CustomCellRenderer;
Source:download
No comments:
Post a Comment